Getting started with Live Chat involves creating your team, configuring the features you want to use, customizing the look and feel of the Live Chat window so it looks good on your website, and then adding the Live Chat widget to your website once you are ready.
This article acquaints you with the features that Comm100 Live Chat provides and the steps you need to take to start using Comm100 Live Chat.
In case you want to download this article, click Getting Started Guide for Live Chat.
Understanding the features that Comm100 Live Chat offers begins with exploring the Control Panel. You can start exploring each feature and setting and tailor them to your business needs.
- Log in to the Control Panel
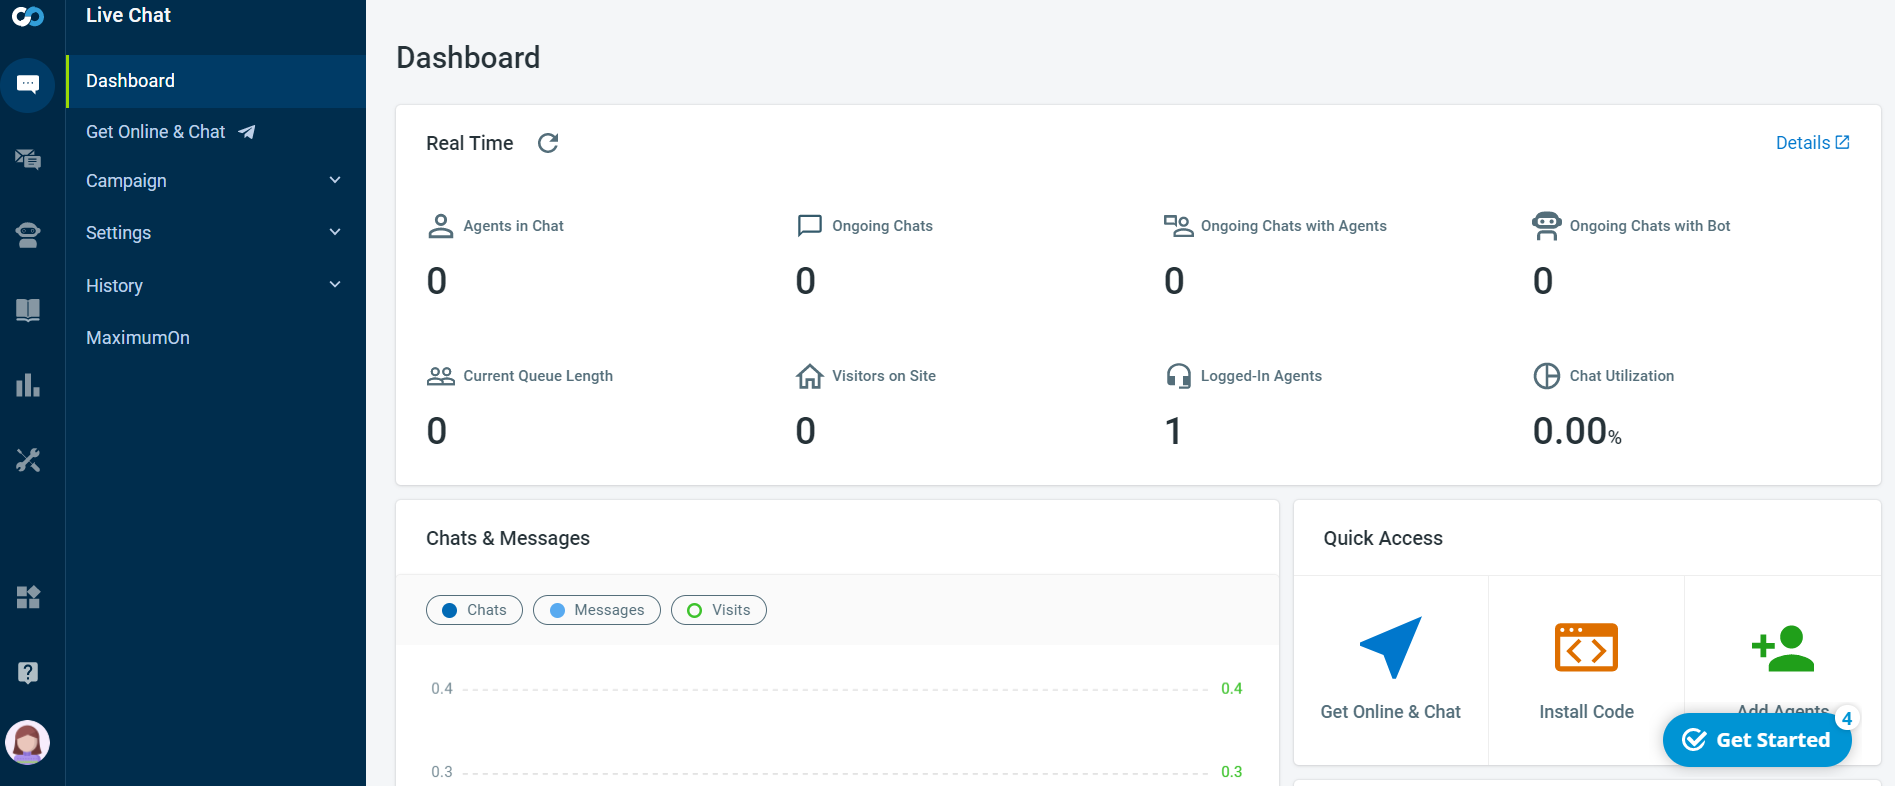
Once your account is ready, you can log in to the Comm100 Control Panel. The Live Chat Dashboard appears after your login. - Set up your Live Chat Campaign
You are now ready to browse through the Campaign menu and create a complete package of how the live chat button and window should look, what details you wish to collect before beginning a chat, details that you wish to save after the chat ends, customize a survey to collect feedback, set up the language that you wish to use, configure your routing rules, and so forth.
Read through the details of the Campaign menu options and learn to configure them:
- Chat Button: The Chat Button sits on your homepage and provides your visitors the option to chat with your agents and get responses to their queries. Comm100 offers three types of Chat Button – Adaptive, Image, and Text Link. You can make the Chat Button available to your visitors when your agents are online and hidden when they are not available.
To learn more about the different types of Chat Button, see this article. - Chat Window: The Chat Window is the interface that visitors use to communicate with your agents. You can customize the Chat Window to change the style and logos. You can choose a company banner at the top of the Chat Window, so it fits neatly in with your website. You can configure the advanced settings to automatically receive chat transcripts with your visitors, automatically end chats if your visitors don't respond within a specific time, and so forth. The Chat Window can also be embedded in the webpage or set to pop up, and visitors can navigate to other sites while chatting.
To learn more about customizing the Chat Window, see this article. - Pre-chat: You can use the Pre-chat window to gather information from the visitor before a chat begins, for example, their name, email address, and so forth. This feature saves time and prevents agents from asking repetitive questions. You can also use the Pre-chat window for chat routing and allocation.
Custom fields can be created to collect any information you need with various input types available, from drop-down lists to simple text fields. You can also set a greeting message to tell your visitor more about your company.
To learn more about enabling and customizing the Pre-chat window, see this article. - Post-chat: The Post-chat survey is a useful tool to see what your customers think about the overall experience they received from the agent they chatted with. You can customize the greeting message and create fields to collect ratings, comments, NPS, and so forth.
To learn more about customizing your Post-chat survey window, see this article. - Offline Message: Offline Message allows your visitors to leave a message if all your agents are offline. You can set any email address to deliver offline messages.
To learn more about Offline Message, see this article. - Invitation: Comm100's Invitation feature lets you send automated chat invites based on specific rules and conditions. For example, if a visitor is on your webpage for longer than 30 seconds, you can have an auto-invitation sent to them inviting them to chat. You can also customize what you want the manual or automatic message to look like.
- Agent Wrap-up: The Agent Wrap-up feature allows you to categorize and comment on every chat in the middle or at the end of a chat. Additionally, you can locate chats easily in the archives using wrap-up fields. Agent Wrap-up helps you manage your chats and retrieve chats from any category whenever you need to check them for review, training, and other purposes.
To learn more about setting Live Chat Wrap-up, see this article. - Language: The Language option lets you customize the language on the visitor side interface.
- Routing Rules: The Routing Rules feature allows you to efficiently route visitors to designated departments or agents based on visitor location, source, navigation history, and other system fields.
To learn more about Routing Rules, see this article. - Chatbot: Comm100's Chatbot is an automated virtual agent designed to answer your visitor's questions. It acts like your human Live Chat agents, helping them handle chat requests and balance their workload.
To learn more about creating your Chatbot, see this article. - KB Integration: The Comm100 Knowledge Base enables you to provide your visitors with a complete self-service support option and empowers agents to help visitors in a better way. Create your knowledge base with FAQs, user guides, how-to articles, integrate it with Live Chat and let your agents resolve visitor queries quickly.
To learn more on integrating and using the Knowledge Base, see this article. - Canned Messages for Campaign: These are pre-defined messages that can be sent instantly to visitors, saving agents time and preventing the same message from being typed out repetitively to different customers.
Learn more on how to create and use canned messages.
- Chat Button: The Chat Button sits on your homepage and provides your visitors the option to chat with your agents and get responses to their queries. Comm100 offers three types of Chat Button – Adaptive, Image, and Text Link. You can make the Chat Button available to your visitors when your agents are online and hidden when they are not available.
- Personalize your Live Chat Settings
Move on to customize the Live Chat Settings menu options and use them to distribute chats, manage shifts, enable features like Auto-Translation, Audio and Video Chats, Co-browsing, ban visitors, and so forth.
Read through the details of the Settings menu options and learn to configure them:
- Auto Distribution: Visitors' chat requests can be automatically accepted by your online agents. Auto Distribution frees your agents from manually accepting chats, and your visitors do not need to wait once they initiate chat requests.
To learn more about using Auto Distribution, see this article. - Shifts: You can use Shifts to manage Live Chat agent schedules, keep your teams organized and clear on when they are needed online to accept visitor chats.
To learn more about using Shifts, see this article. - Auto Translations: The built-in Google Translate integration helps you automatically translate chat messages to and from a visitor who speaks a different language.
To learn more about enabling and using this setting, see this article. - Audio & Video Chat: The Audio & Video Chat feature in Comm100 Live Chat enables your agents and your customers to talk over chat at any time. The solution offers more efficient and effective communication, speeds up resolution time, and improves customer experiences for higher satisfaction rates and increased sales.
To learn more about Audio & Video Chat, see this article. - Co-browsing: Co-browsing allows you to view and access your visitor’s web browser in real time, and you can request permission to control a visitor's web page. Co-browsing facilitates faster resolution in complex or technical scenarios.
To learn more about Co-browsing, see this article. - Ban List: You can use Ban List to block visitors from initiating chat requests. With Comm100 Live Chat, you can ban visitors by IP or by visitor ID.
To learn more about blocking visitors, see this article. - Conversion: The Conversion feature links Live Chat data with your onsite data, allowing you to view how many chats and the detail of chats, which drive your customers to convert. Conversion allows you to assess what types of chats are most useful in encouraging visitors to convert, as well as assessing exactly how much live chat contributes to the actions that sustain your business.
To learn more about using this feature, see this article. - Segmentation: Segmentation allows you to divide your visitors into different segments based on pre-defined rulesFor example, you can create a visitor segment for VIP clients and have notifications sent to your VIP support team whenever a VIP client arrives on your website. You can set the color of each segment so that they can easily be identified from the Agent Console.
To learn more about setting up Segmentation, see this article. - Secure Forms: Secure Forms allow you to collect data securely. During a Live Chat interaction, your agents may need to collect sensitive visitor information that your visitors may not want you to save in your databases. In such cases, you can create and use secure forms as the data collected through these forms are not stored in chat transcripts.
- Visitor Single Sign-On: The Visitor Single Sign-On feature lets you authenticate your visitor's account information before the chat starts. Once customers log in, your agents can view their account information in Comm100 Live Chat. This information helps the agents know the visitor they are chatting with and avoid asking the same standard questions, speeding up the resolution and improving customer satisfaction.
To learn more about setting up the feature, see this article.
- Auto Distribution: Visitors' chat requests can be automatically accepted by your online agents. Auto Distribution frees your agents from manually accepting chats, and your visitors do not need to wait once they initiate chat requests.
- Add agents, set up your teams and departments
You can start accepting chats and use the features and settings you just configured when your agents and teams are ready, and their roles and availability status are defined. You can use Comm100's Global Settings to add agents, create departments, and define their roles.
Read through the details of the People menu options in Global Settings and learn to add and configure them:
- Agents: Agents serve as the face of your organization for your visitors. Add agents to your Live Chat dashboard and define their department and roles clearly.
- Departments: A Department represents a business unit in your organization with specific responsibilities. Departments help you assign incoming visitors to the most suitable agents. You can create multiple departments to group your agents according to their responsibilities. Through Departments, you can ensure chats and messages get forwarded to the correct teams.
For example, you can create separate departments for support, billing, and sales within your organization.
To learn more about setting up Departments, see this article. - Skills: Skill-Based Routing (SBR) is a way to route chats based on agents’ skills, so that your visitors can quickly get the targeted support that they need. Skills can be languages, IT skills, or product areas. By grouping agents into departments and defining agents’ skills, you can route visitors to agents in a specified department with certain skills, so that visitors can get targeted support quickly.
To learn more about setting up Departments, see this article. - Roles: You can define the roles of any agent you add to your Live Chat dashboard. You can create roles like administrators, agents, and so forth. You can specify the permissions accessible to each of these roles.
- Custom Away Status: Custom Away Statuses allow you to create and customize agent statuses for better reporting purposes. For example, it may be that the default "Busy" status isn't detailed enough for you to analyze agent states, and it may be that custom statuses of "Lunch," "Meetings," and "Comfort Break" give you greater visibility.
- Set up your Site Security and Site Profile
Make use of Comm100's Site Security features to safeguard your visitor's data and privacy. Restrict your agents from using offensive words by utilizing the features like credit card masking, password policy, restricted words, and so forth.
Read through the details of the Site Security features, and learn to add and configure them:
- Restricted Words: Create and manage restricted words that you do not want your agents to use while interacting with your visitors. Once you enable this feature and add restricted words, agents' messages are highlighted and cannot be sent until the restricted words are removed.
- Credit Card Masking: Credit Card Masking allows you to mask credit card numbers sent by visitors during chat sessions. When credit card numbers are necessary, you can request the information from visitors through Secure Forms. These forms help you meet higher security standards and ensures that visitors' sensitive data is safe with you.
- Password Policy: Create policies around password protection, defining the options like the number of characters, type and mix of characters to be used, password expiry time, failed login attempts with an incorrect password, and so forth.
- IP Allowlist: Use the IP Allowlist to control access to the Comm100 Control Panel and Agent Console by restricting logins to specific IPs.
- Agent Single Sign-On: Comm100 Agent Single Sign-On allows your agents to sign in to Comm100 using a third-party application. That way, your team can move between different tools and doesn't have to remember multiple sets of login credentials. Comm100 supports Agent SSO via SAML or JWT.
To learn more about configuring Agent SSO, see SAML and JWT. - Audit Log: You can use the Audit Log to review all agent activity. This feature records all agent activities so you can check all previous events that took place.
- OAuth Client: An OAuth Client is a token-based method of authentication which allows a third-party application to access Comm100 API using OAuth protocol.
To learn more about OAuth, see this article. - Create your Site Profile: Use the Site Profile feature to create your site profile by defining details like site ID, site name, website, phone number, mailing address, time zone, company size, country, and so forth.
- Learn using the Live Chat History
Once you start accepting chats, you need to check your chat volume, chat duration, missed or refused chats, offline messages, details of the department and agent that handled the chat, check the chat transcript to maintain quality, and so forth.
To learn more about using the History feature, see this article.
You have the choice to use the Agent Console either from your PC's browser or by installing our desktop app. You can also access Agent Console on your mobile phone by installing the Comm100 Live Chat app.
We recommend you use the desktop app as it contains features like Auto-Away, Auto logout, and so forth.
Use these links to download the desktop app:
- Log in to Agent Console
After downloading and installing the desktop app, log in to the Agent Console. The Agent Console home appears after your login. - Check your Live Chat Preferences
Customize your preferences like Shortcuts & Greetings, Notification, Language, Visitor Columns, and other settings from here.- Shortcuts & Greeting: You can use the Shortcut & Greetings tab from the Preferences menu to create keyboard shortcuts for sending messages, switching to the next chat or next response, searching for canned messages, or sending a pre-defined greeting message to a visitor.
- Notification: Use the Notification tab from the Preferences menu to set notifications for a new visitor, incoming chat, chat in queues, new response, and so forth
- Language: You can set a spell checker, language direction, and auto-translation from the Language tab.
- Visitor Columns: Use the Visitor Columns tab to select columns that you want to hide or display in the Visitors tab in your Agent Console, as well as adjust their display order.
- Others: In the Others tab, you can set your preference for automatically monitoring all ongoing and new incoming chats and automatically closing the chat window.
To learn more about customizing each Preference menu option, see this article.
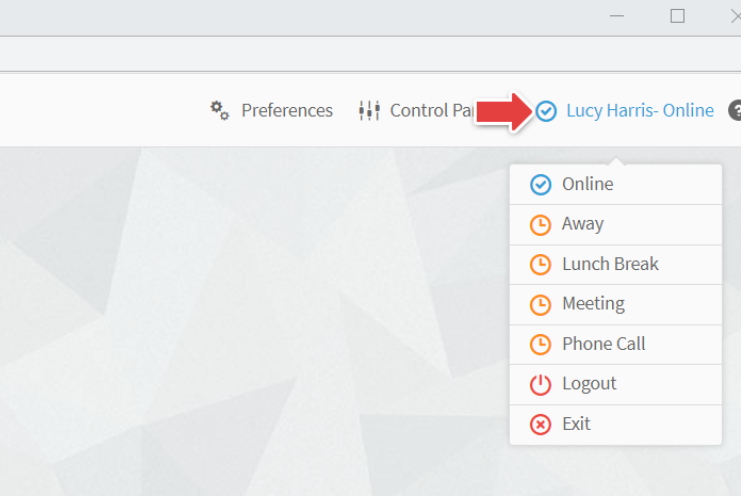
- Set your status to Online and start accepting chats
You can work with the status you wish to show to your visitors by clicking on the agent's name shown on the top right of the Agent Console home page.

Once you are done exploring the Control Panel, setting up your Campaign, and configuring your Live Chat Settings, you are ready to make Live Chat available to your visitors.
To make Live Chat available to your visitors, you must copy the installation code and paste it onto your website.
To learn more about installing Live Chat on your website, see this article.
Comm100's support team is available 24 hours a day, seven days a week. If you need any additional help to set up the Live Chat and go live, you can chat with us.
Comm100's Reporting feature provides you with the data and metrics that matter most to your chat quality, agent performance, visitor satisfaction, and Chatbot performance so that you can make informed decisions for improvement.
To learn more about the Live Chat reporting menu option, see the Live Chat Reports section in this article.
Comm100 Live Chat offers a wide range of integrations with key systems, including CRM and shopping cart platforms, and a highly flexible API that lets you transfer data to and from the other relevant platforms in your ecosystem. Choose the Apps and Integrations that suit your business need and integrate them with your Live Chat.
- Configure RESTful API
Comm100's RESTful API enables you to integrate your applications with Comm100 Live Chat to allow both systems to exchange information. To learn more about APIs, click here for a quick introduction. - Integrate Third-Party Applications
Comm100 Live Chat can also be integrated with a host of different applications such as Salesforce, Dynamics 365, Cisco, Magento, Deltapath, Calendly, Zapier, Google Analytics, Zendesk, and GoToMeeting.
To learn more about applications that can integrate with Live Chat, click here. - Configure Webhooks
Webhooks allow you to receive notifications from Comm100 when a certain event happens. You can register an "http://" or "https://" URL where event data can be stored in JSON format.
To learn how Webhooks are configured within Live Chat, see this article. - Configure Custom Variables
Custom Variables allow you to read visitor information from your website and pass it to your live chat system.
To learn more about custom variables and how they are set up, see this article.