A Task Bot is a bot that automates rule-based and repetitive actions to help improve your team's productivity and efficiency.
It allows businesses to increase customer engagement on their website and provide their customers with an "always-on" self-service option. Businesses can collect leads, book meetings, route chats, reduce wait times, and automate basic customer service workflows.
With a Task Bot in place, you can maximize your time spent on the most complex, sensitive, and high-value interactions.
Your Task Bot building process revolves around the set of Actions connected in a guided workflow, whether you build a custom bot or from a template. Only agents who have permission can use these Actions to build a Task Bot.

The table lists the following Task Bot Actions.
Actions | Description |
Send Content | |
Send a message | This action allows you to send a message to the visitor. Each message supports up to ten buttons. |
Send quick reply options | This action allows you to send up to ten quick reply options to the visitor. Each quick reply option leads to a further Task Bot Action. |
Send an image | This action allows you to send an image file or URL to the visitor. |
Send a video | This action allows you to send the URL of a video to the visitor. |
Collect Info | |
Collect name | This action allows you to collect the name of the customer. This data is saved to the variable "Name". |
Collect email | This action allows you to collect the email address of the visitor. This data is saved to the variable "Email". |
Collect phone number | This action allows you to collect the phone number of the visitor. This data is saved to the variable "PhoneNumber". |
Collect company name | This action allows you to collect the company name of the visitor. This data is saved to the variable "CompanyName". |
Collect comment | This action allows you to collect comments from the visitor. This data is saved to the variable "Comment". |
Collect variable data | This action allows you to collect custom information from the visitor and save it to a variable—for example, User Name. You can create any variable. The variable value will only exist when the current task bot is alive in a chat. |
Collect location | This action allows you to collect the location of the visitor. The collected location data can only be used in webhook. |
| Flow Operations | |
| Transfer chat | This action allows you to transfer the chat to a specific agent, department, or transfer the chat based on the Campaign's routing rules. |
| Go to task bot | This action allows you to transfer to another Task Bot when a present Task Bot is finished. |
Advanced | |
Trigger a webhook | This action allows you to send and receive data to an external server or third-party services like Salesforce, Zendesk, Zapier, etc, using Webhook. |
Show SSO login button | This action allows the visitor to log in via SSO. You can set a login button for visitors to log in and configure different branches for a successful and failed login. |
Book a meeting via Calendly | This action allows you to schedule meetings in Calendly. When the Book Meeting action is triggered, Task Bot shows the Book Meeting page from Calendly to the chat window. It then guides the visitor to book a meeting with the pre-defined agent's Calendly account. |
Send an email | This action allows you to send emails. For example, you can send the visitor's information to the company's lead collection email box. |
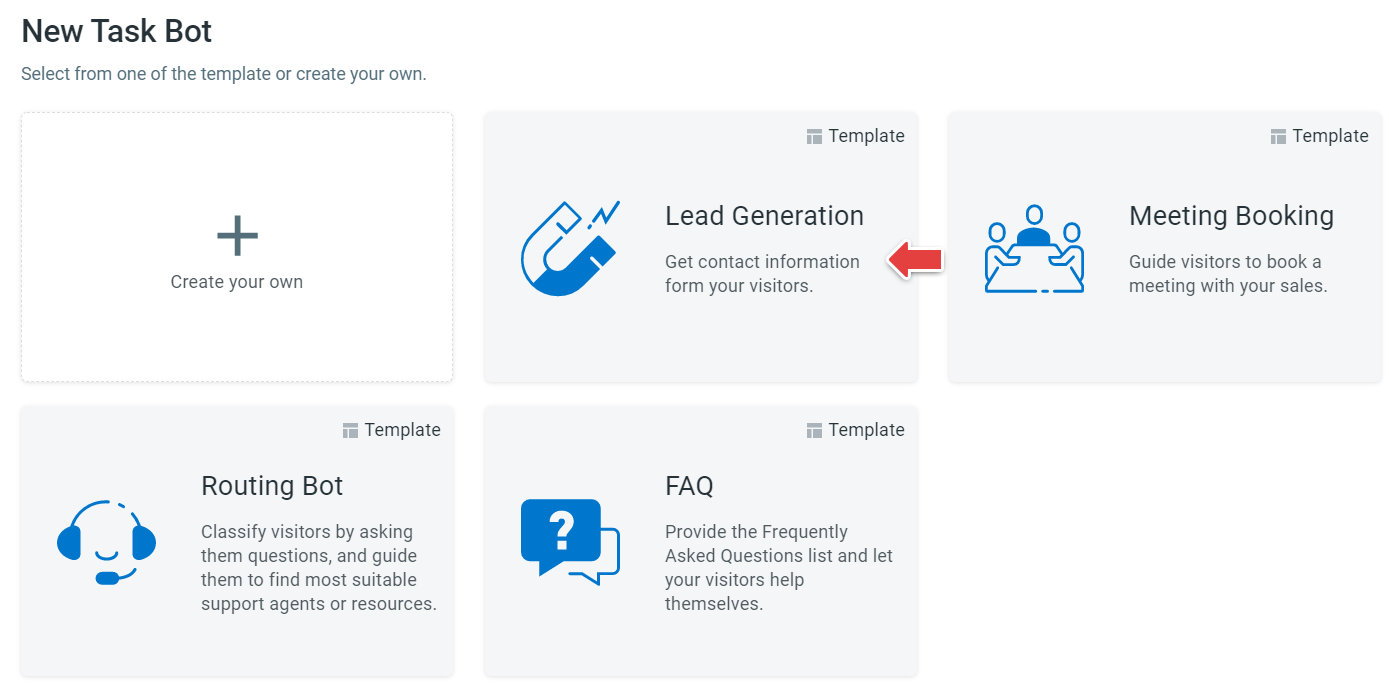
Comm100 provides four pre-built Task Bot templates. Using these templates, you can build your Custom Task Bot.
The table lists the following Task Bot templates.
Template | Description |
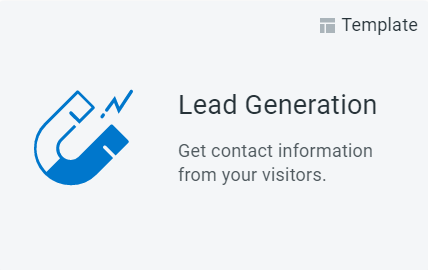 | It is used to get contact information from your visitors. |
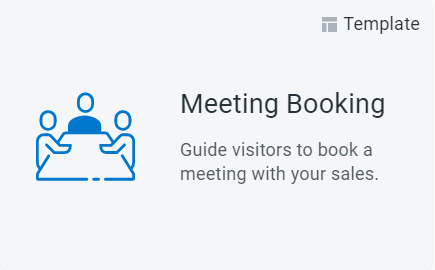 | It is used to guide visitors to book a meeting with your sales. |
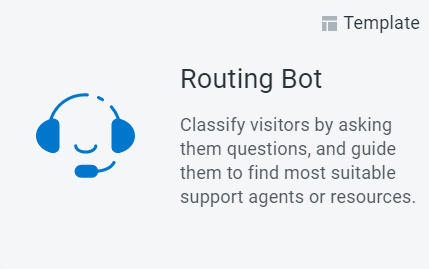 | It is used to classify visitors by asking them questions and guide them to find the most suitable support agents or resources. |
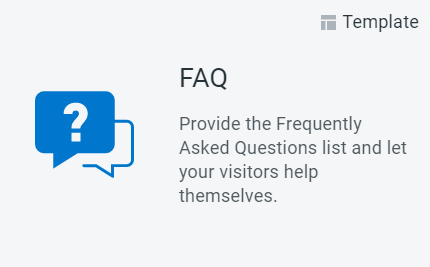 | It is used to provide the frequently asked questions list and let your visitors help themselves. |
You can create a Task Bot either of your own or by selecting from the pre-built template.
To create a Task Bot, follow these steps:
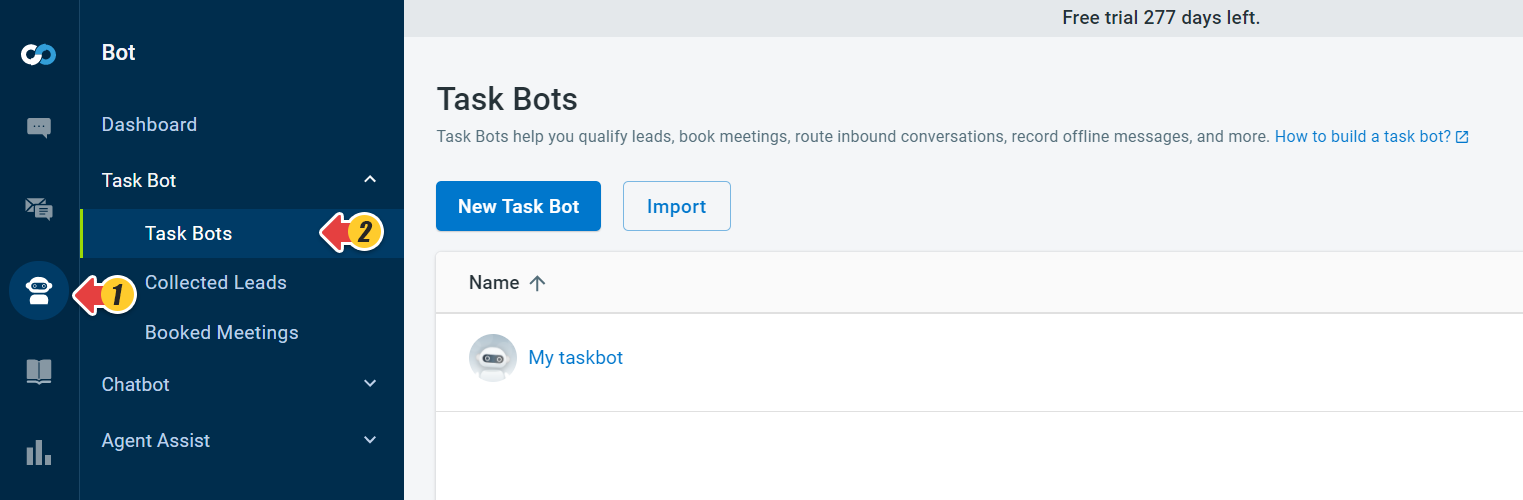
- Log in to your Comm100 account.
- From the left navigation menu, go to Bot > Task Bot > Task Bots.
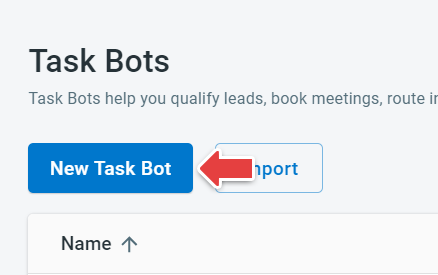
- On the Task Bots page, click New Task Bot.
- The New Task Bot drawer appears. If you'd like to collect lead info via the Task Bot, here you can select the Lead Generation template. To learn more on the templates, see Task Bot Templates. We'll take the Lead Generation template as a sample.
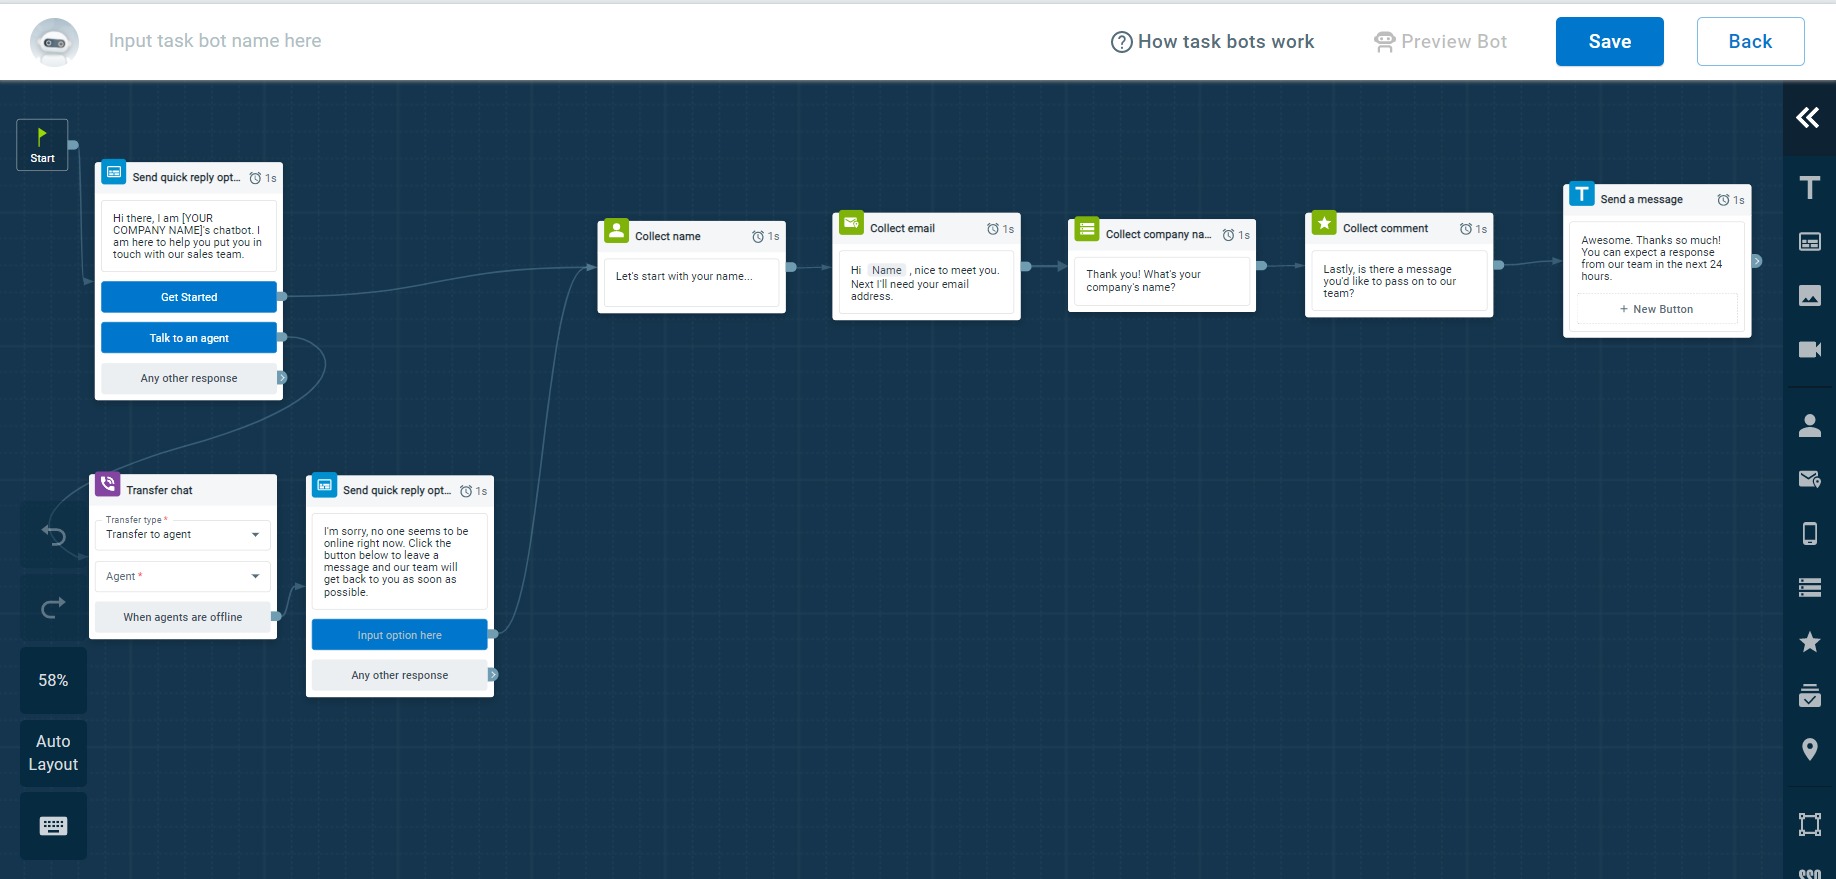
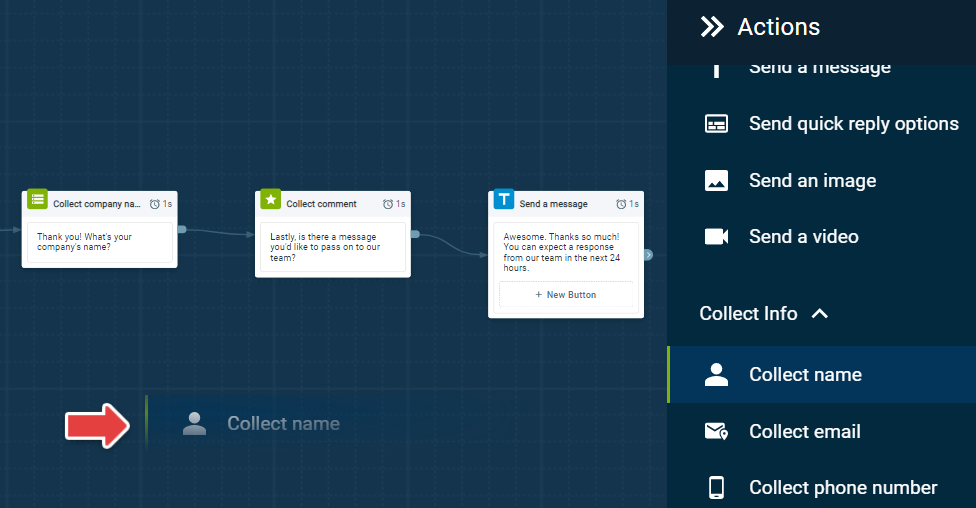
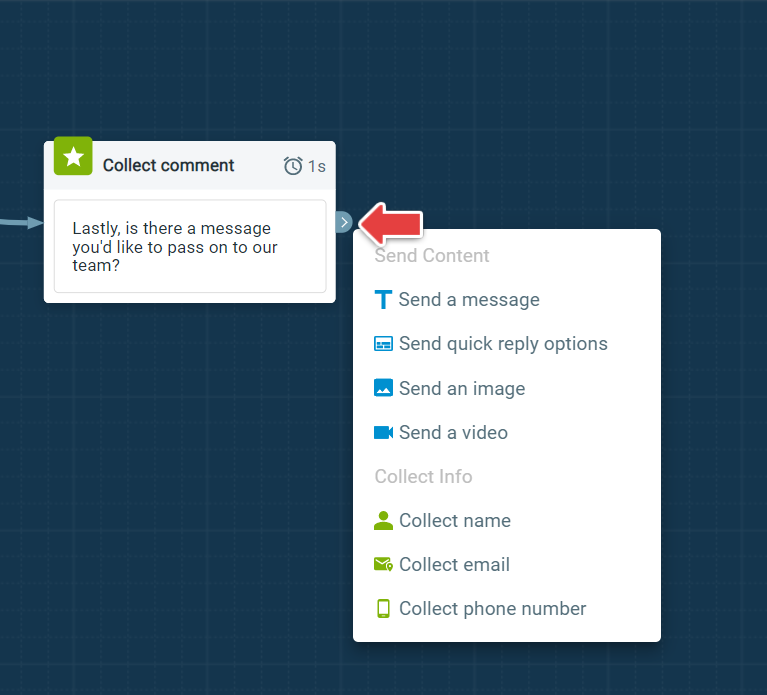
The Task Bot builder page is displayed with the set of pre-built connected Task Bot Actions. To learn more about these actions, see Task Bot Actions. - From the Actions menu, you can drag the Task Bot actions to the Bot Builder area and connect them in a guided workflow.
You can also add Actions by dragging out the node and selecting the required action. - Here, choose a Send a message action and enter the text. You can also copy or delete the action during the Task Bot building process.
- You can also add a delay to bot responses to deliver multiple messages to the customer at a comfortable reading pace.
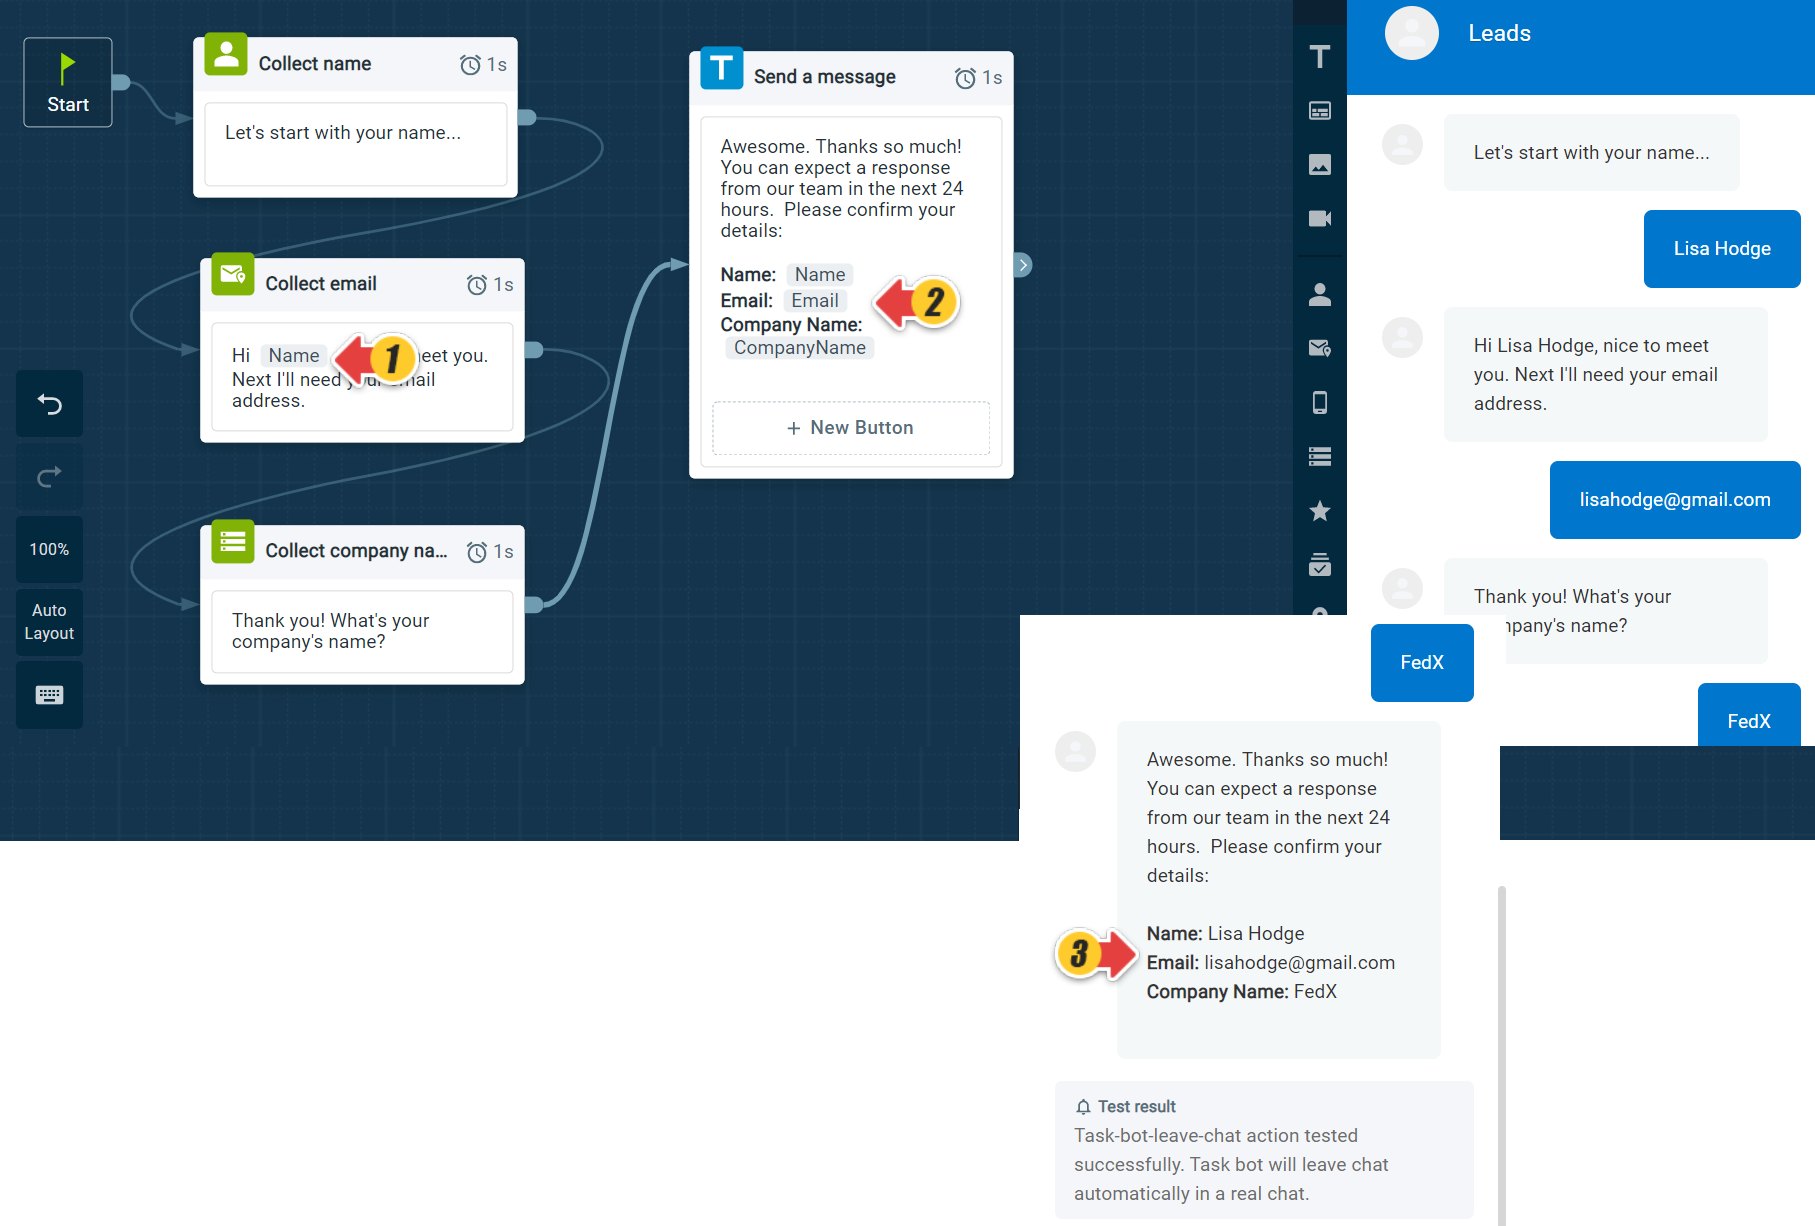
- Each Task Bot has its own set and namespace of variables. You can add and remove variables when editing Task Bot actions. Task Bot can ask a visitor a question and save the visitor's answer or choice to the variable.
Note: You can use the variable's value and Collected Info value in all messages in all Task Bot Actions as Dynamic Info.
- The Task Bot builder also allows you to perform the following operations during your bot building process, such as Undo, Redo, Zoom In and Out, Auto Layout, and Shortcuts information. During bot building, the flow of many actions becomes complicated. The Auto Layout enables you to auto arrange the Actions and make the flow clearer. You can also Zoom In to see the details and Zoom Out to see the whole picture of the bot building workflow.
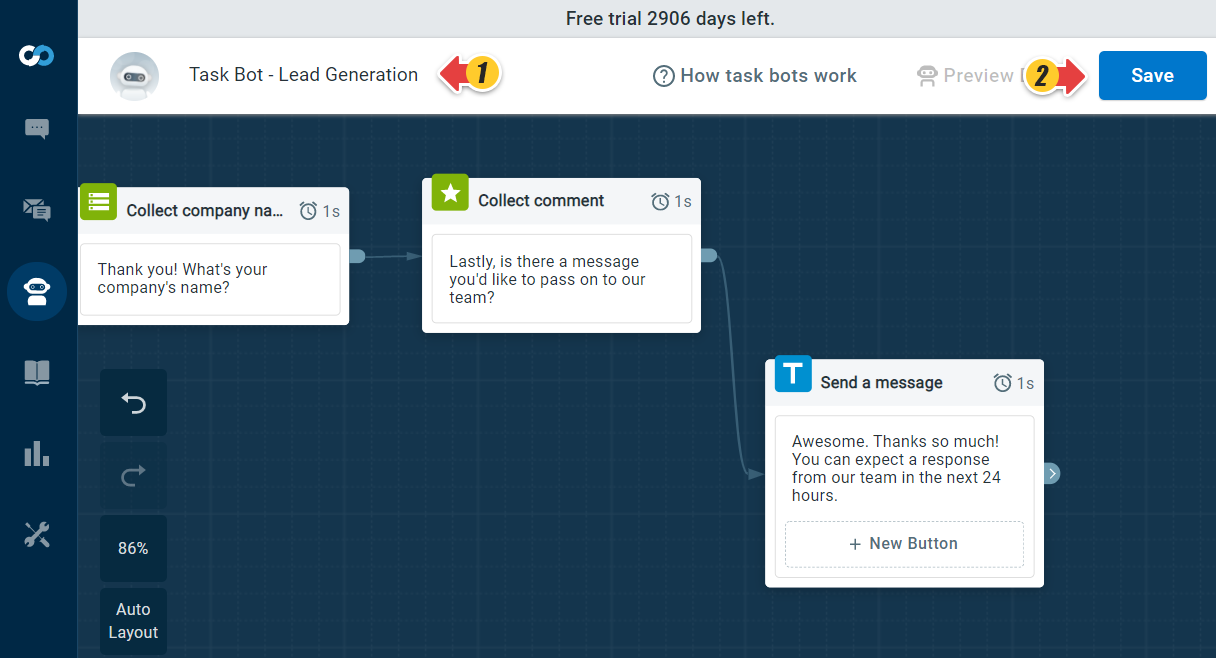
- Once your bot building process is complete, provide a name and click Save.
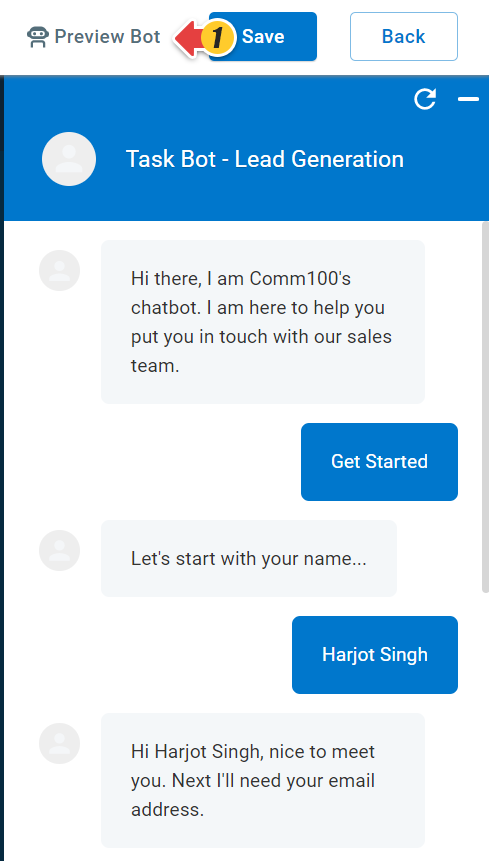
- Now, click the Preview Bot button to test your Task Bot.
- Click Back to go to the Task Bots page.
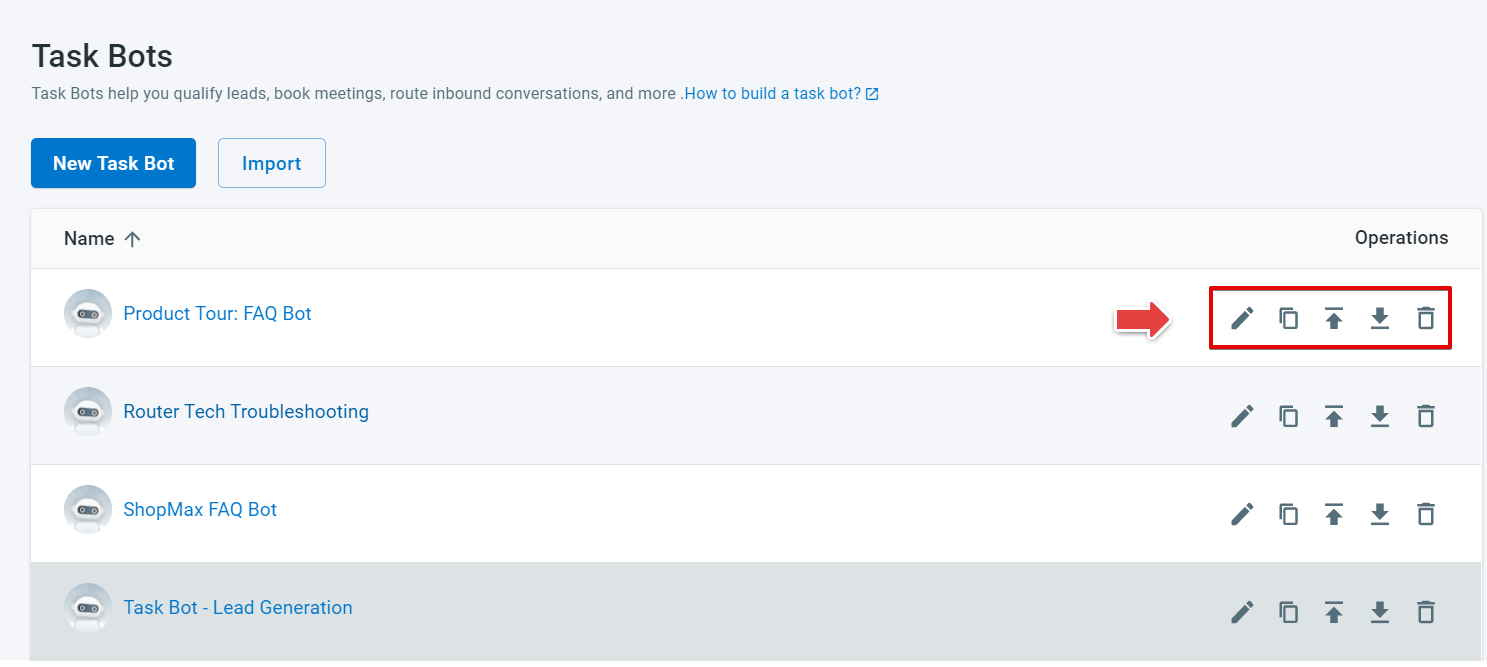
- The newly created Task Bot appears on the Task Bots page. Here, you can manage all the existing Task Bots using Bot operations, such as edit, copy, import, export, and delete.


Task Bot can be a good alternative in collecting the Pre-chat and Offline Message information from the visitor. To use a Task Bot to collect Pre-chat and Offline Message info, you need to create a Live Chat Campaign or configure your existing Campaign.
Use Task Bot to collect Pre-Chat Information
To collect the Pre-Chat information using a Task Bot, follow these steps:
- Log in to your Comm100 account.
- From the left navigation menu, go to Live Chat > Campaign.
- Choose a campaign from the drop-down list and go to Pre-chat.
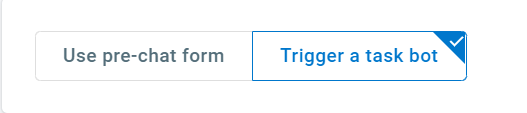
- Enable the Pre-chat and select Trigger a task bot.
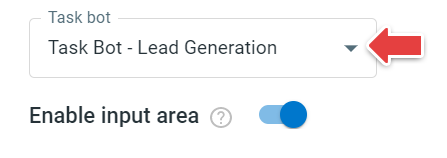
When a visitor clicks on your chat button to start a chat, the task bot automates basic actions, including collecting visitor info, qualifying leads, routing visitors, booking meetings, and more. - Select your Task Bot from the drop-down list.
- If required, you can also turn on the Enable input area toggle key.
Note: By default, the visitor input area inside the chat window is turned off for the task bot. If you want to allow visitors to send content to the task bot, you can enable it.
- Click Save.

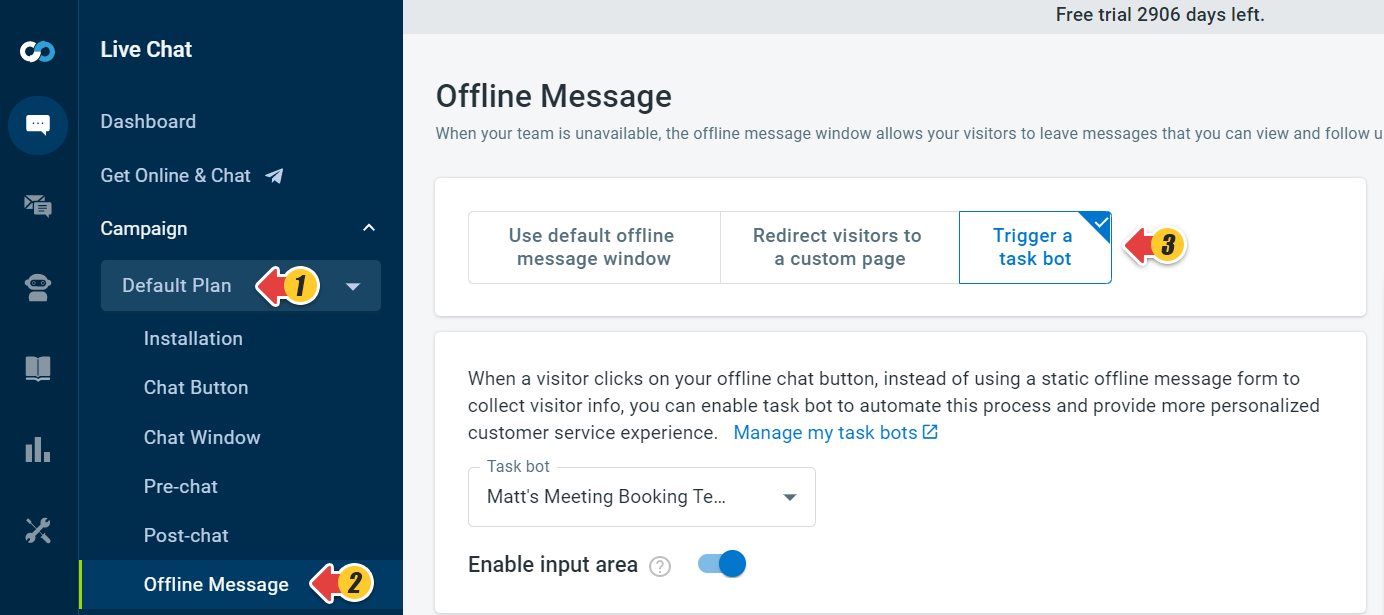
Use Task Bot to collect Offline Message
To collect the Offline Messages using a Task Bot, follow these steps:
- From the left navigation menu, go to Offline Message.
- Select Trigger a task bot.
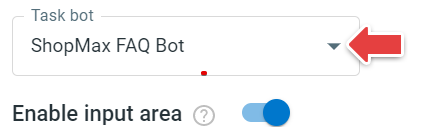
When a visitor clicks on your offline chat button, a task bot automates this process and provides a more personalized customer service experience. - Select your Task Bot from the drop-down list.
- If required, you can also turn on the Enable input area toggle key.
Note: By default, the visitor input area inside the chat window is turned off for the task bot. If you want to allow visitors to send content to the task bot, you can enable it.
- Click Save.
Task Bot on Chatbot Intent
You can set Task Bot as your bot response in the Live Chat channel of the Chatbot Intent.
To trigger a Task Bot in Chatbot Intent, follow these steps:
- Log in to your Comm100 account.
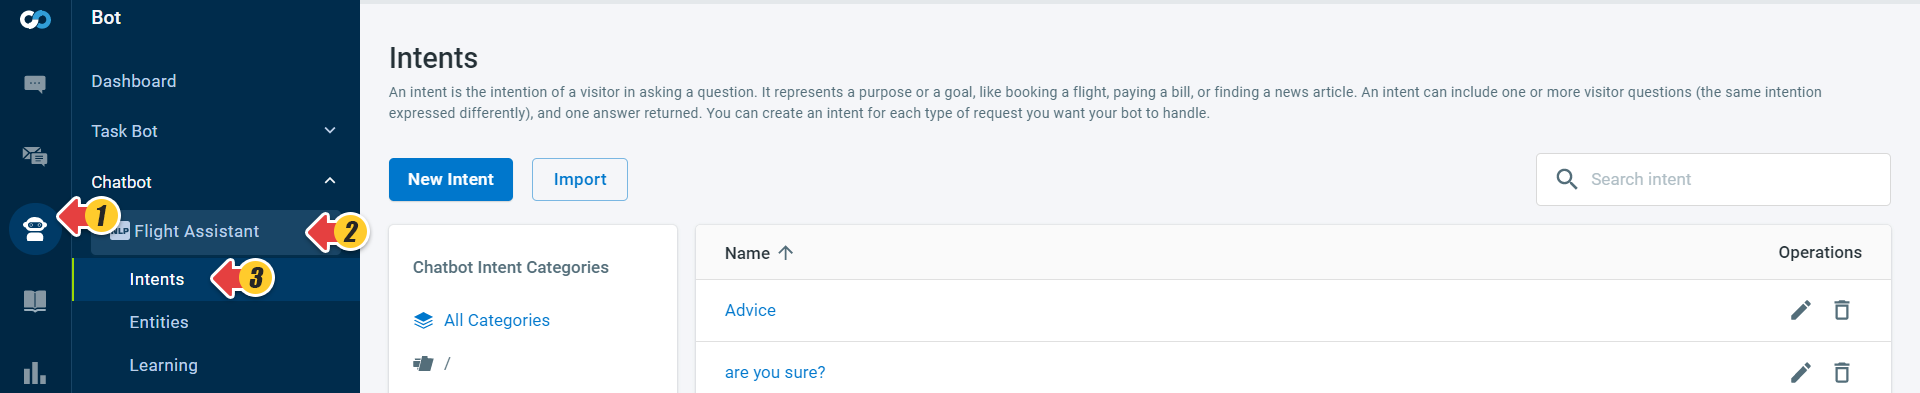
- From the left navigation menu, go to Bot > Chatbot.
- Select your Bot from the drop-down list.
- Go to Intents.
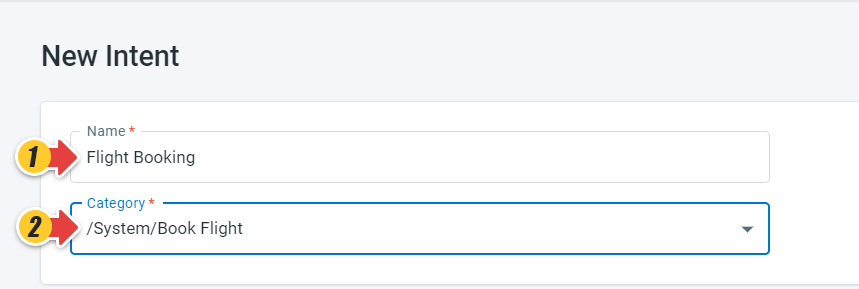
- On the Intents page, click New Intent.
- On the New Intent page, enter the Intent name and select its category.
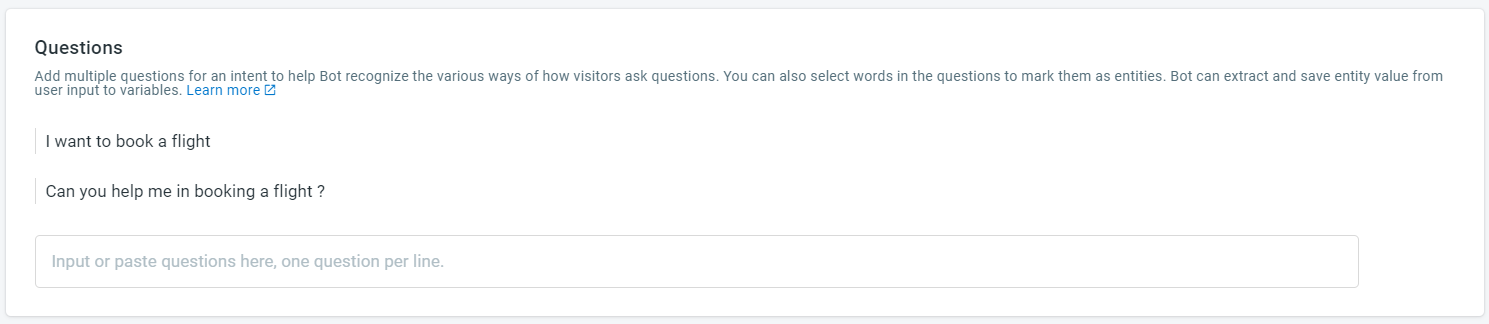
The intent name should summarize the content of the intent question as it is visible to visitors when the Bot sends a possible answer. - In the Questions section, enter the question in the Questions text field.
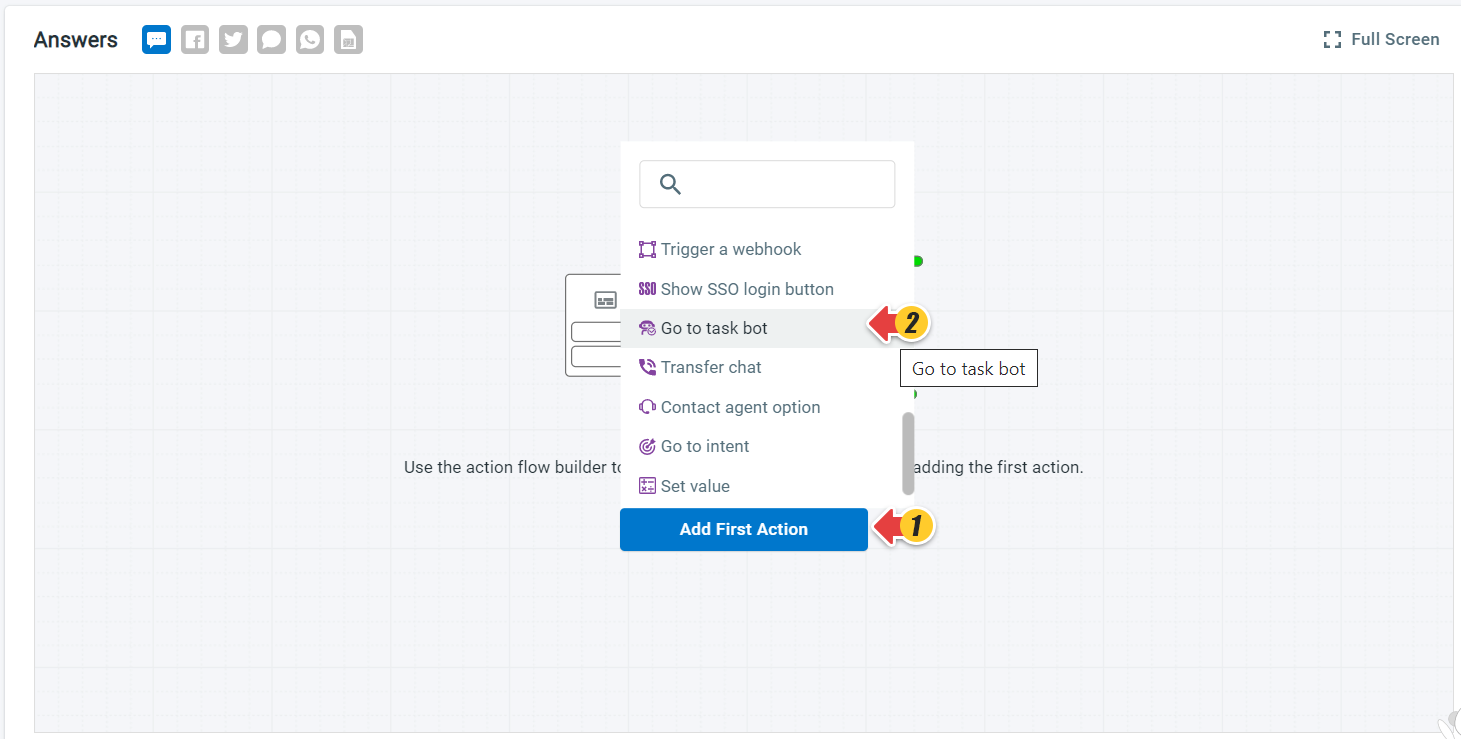
You can add as many questions as you want and delete the added questions by clicking the delete option given against each question. - In the Answers section of the flow builder, select the Live Chat channel and click Add First Action.
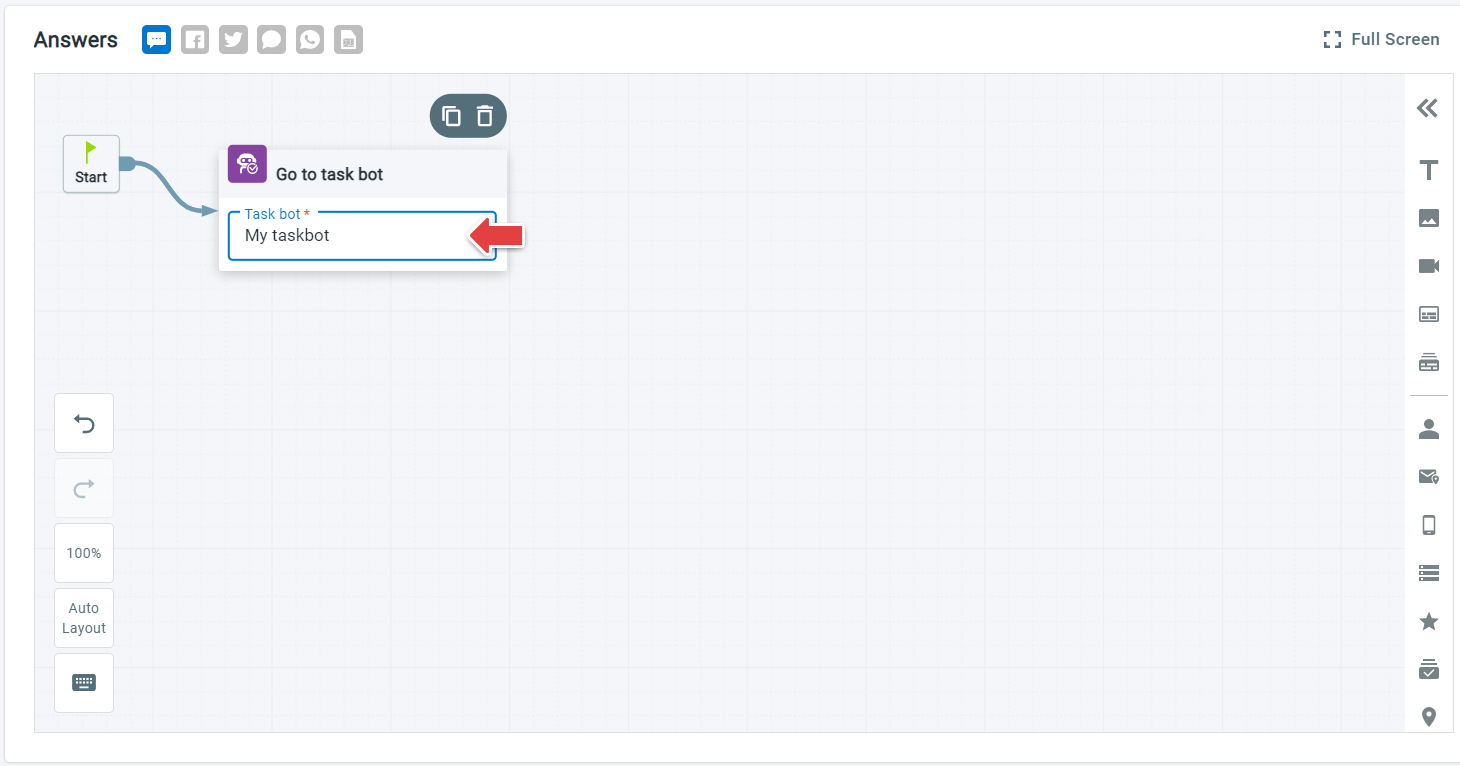
- Choose the Go to task bot action.
- On the Go to task bot action, select a Task Bot from the drop-down list.
- Click Save.
Task Bot on Chat Window
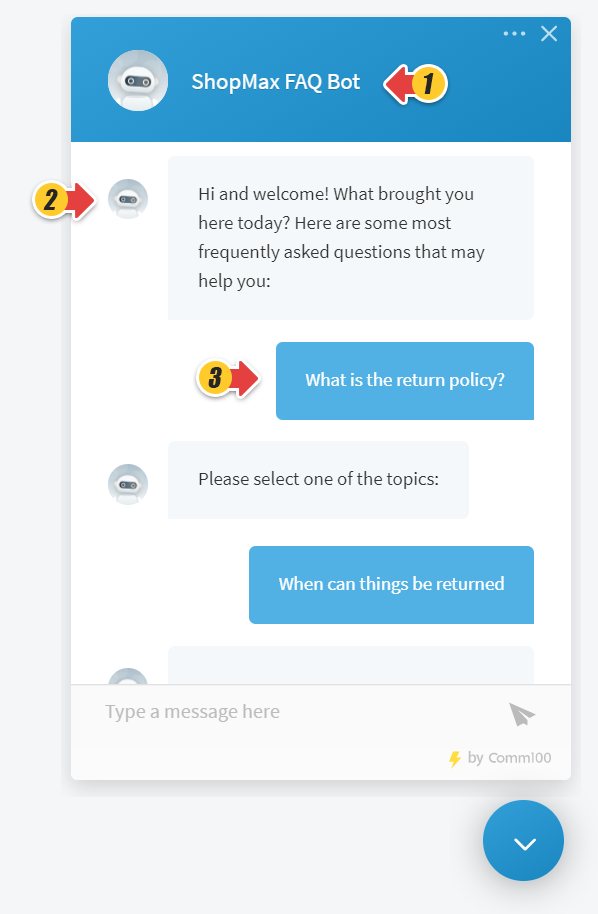
When a visitor contacts the business on their Live Chat, a Task Bot takes control of the Chat Window and executes the set of actions as per the visitor's response. A conversation between the visitor and the Task Bot is in place.
Task Bot on Comm100 Agent Console
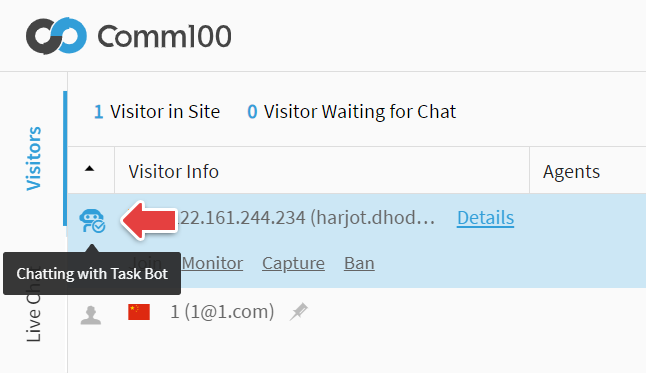
- On Comm100 Agent Console, agents can see the chat status of the visitor.
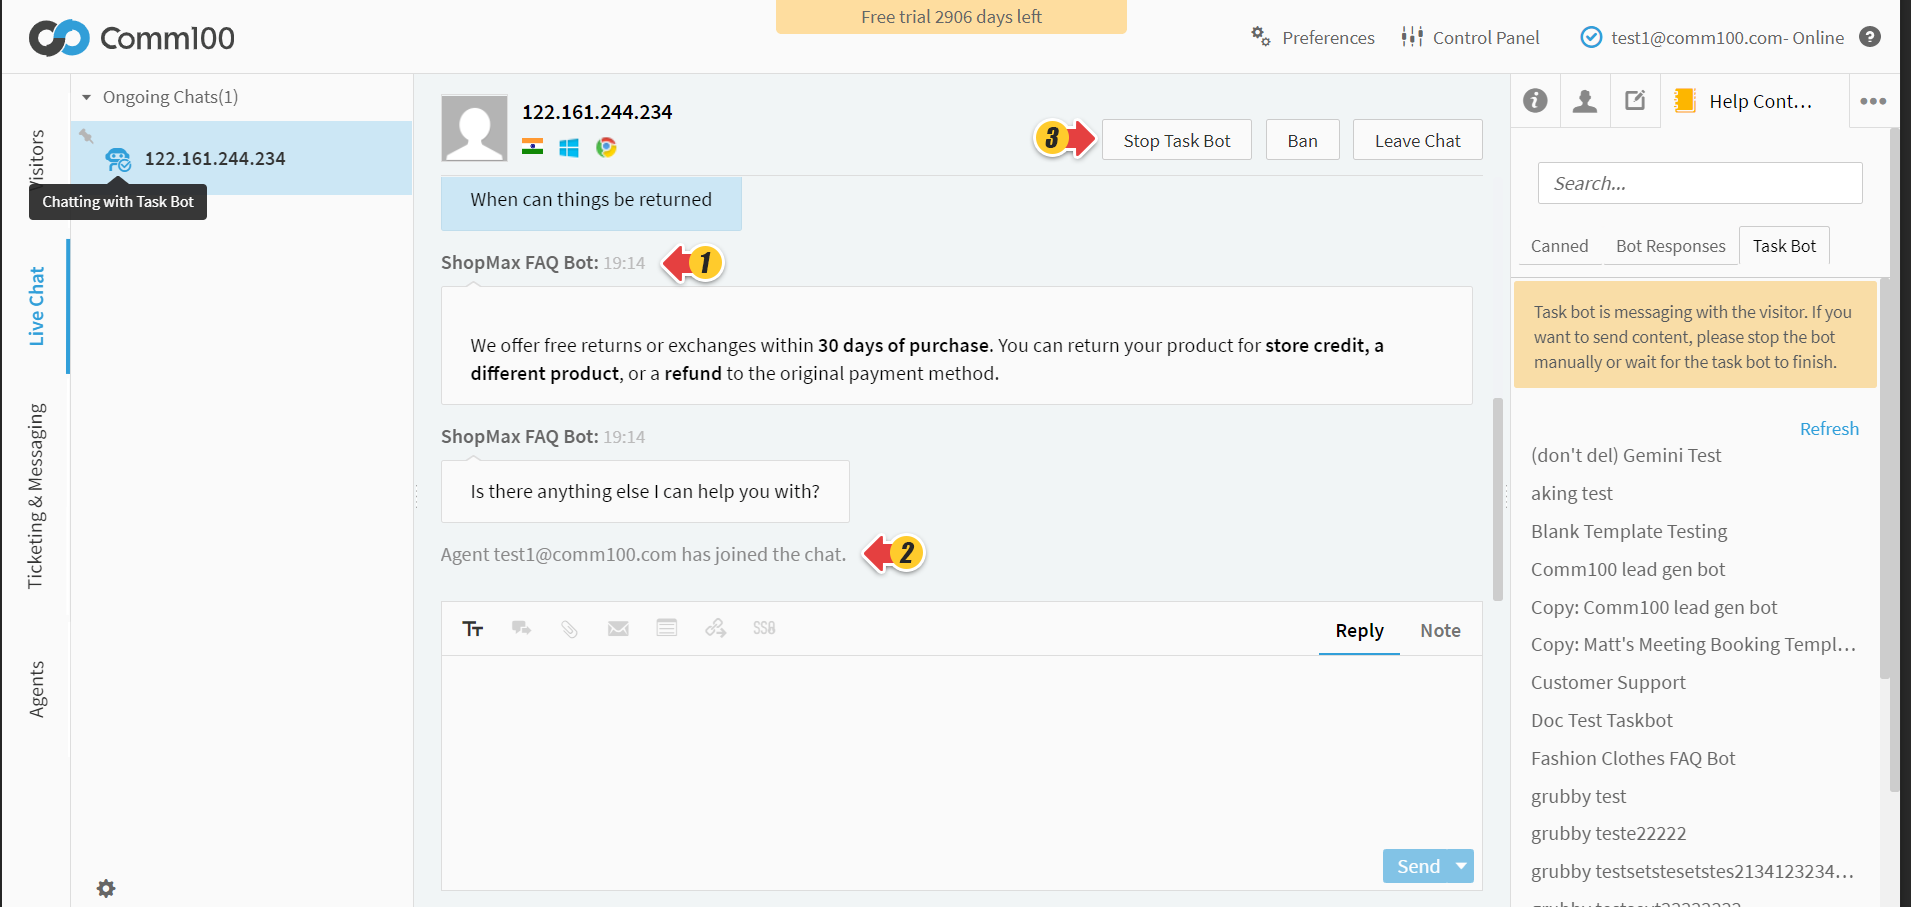
- On joining the chat, agents can view the conversation happening between the visitor and the Task Bot. The agent can either wait for the Task Bot to finish the chat or control the chat by clicking the Stop Task Bot button.
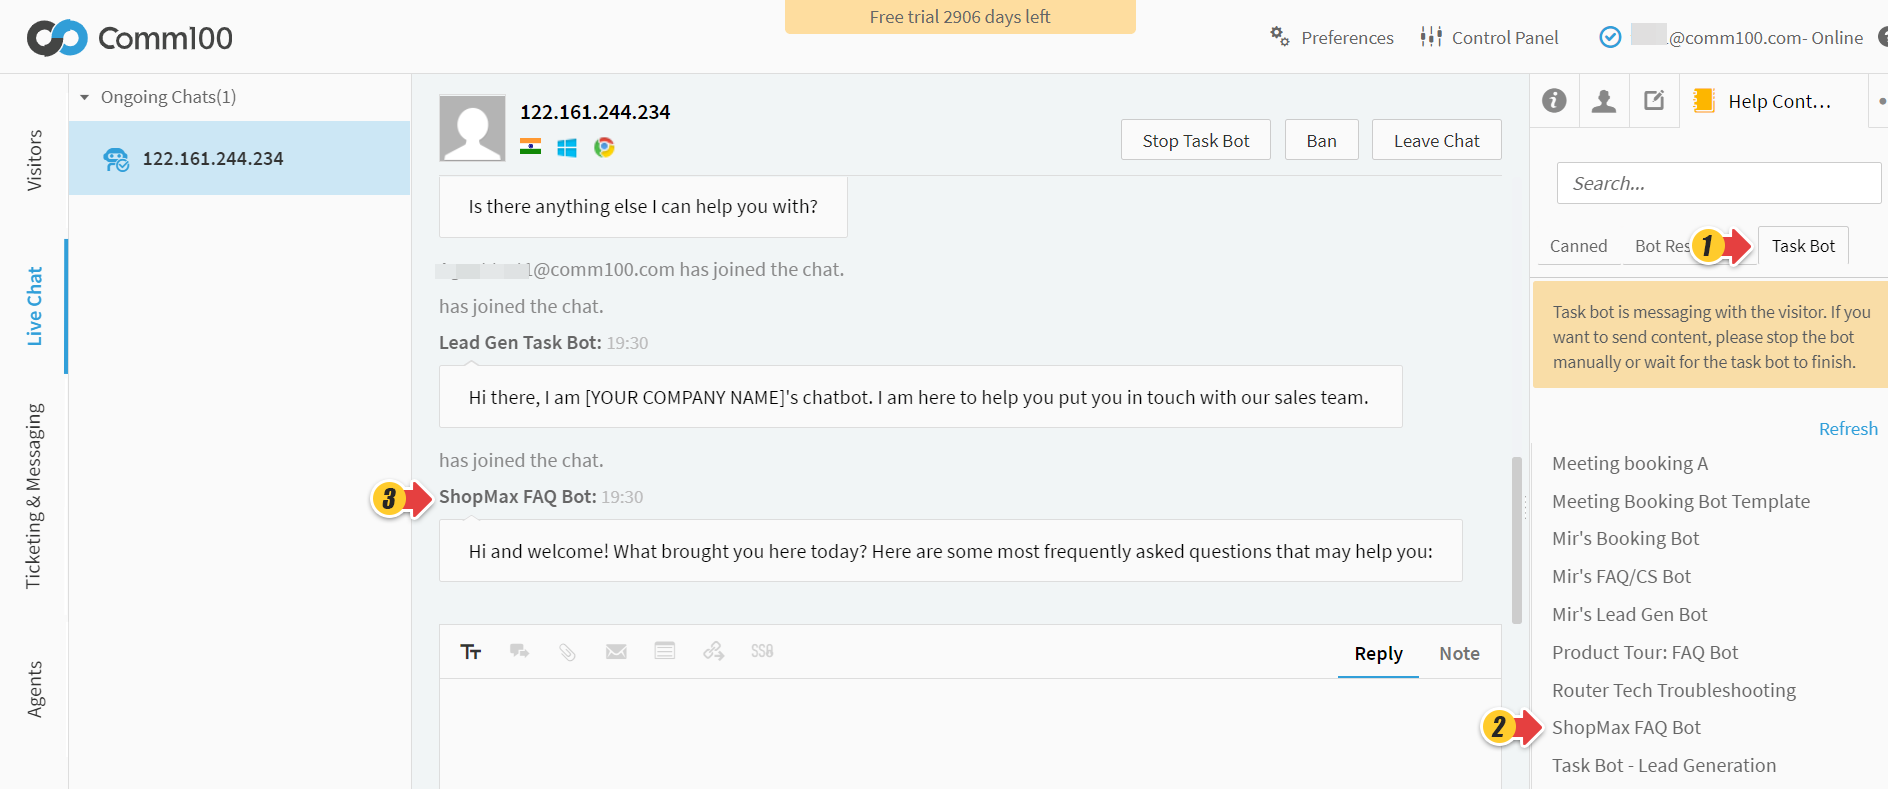
- Agents can also trigger Task Bot from the Help Content tab of Agent Console. They need to select the Task Bot tab and choose the Bot from the list. The Task Bot will join the chat and talk to the visitor. The agent will still be in the chat and can monitor or stop the Task Bot anytime.
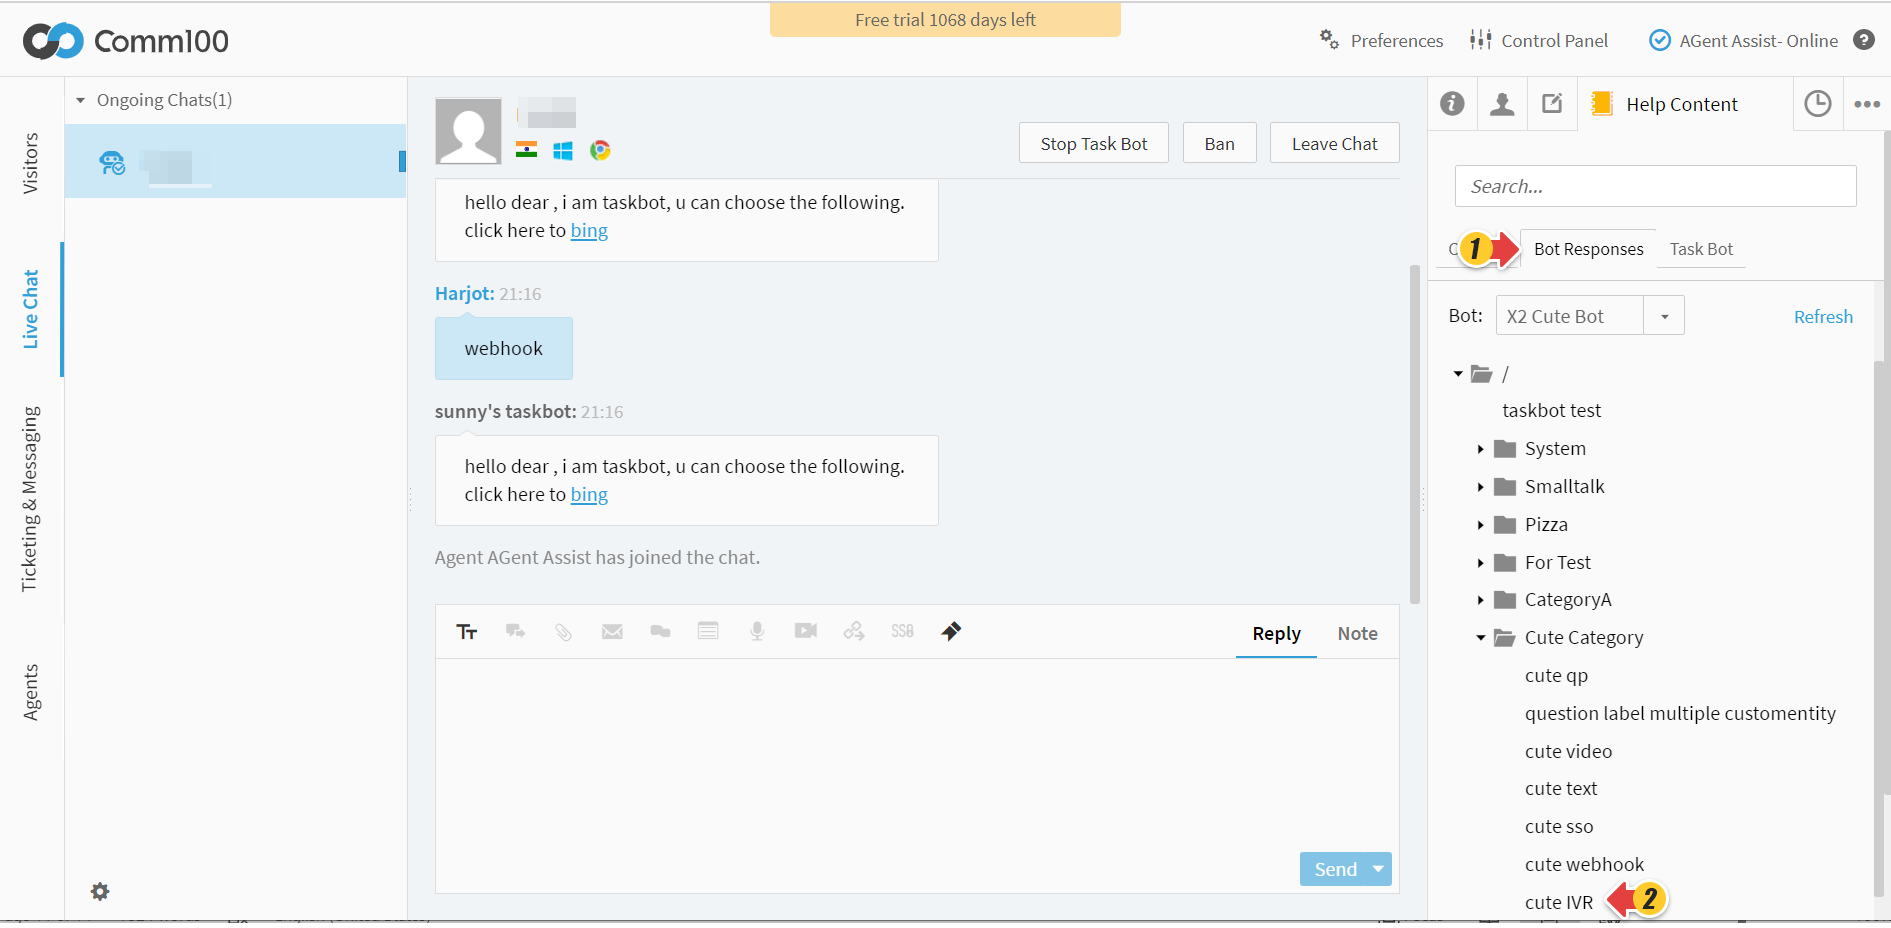
- On Agent Console, if there is a matching intent from the visitor, the agent can share a corresponding bot response. The agent can select the Bot Response tab and choose the Chatbot and its Intent from the list. The Chatbot intent triggers a Task Bot flow during the chat. When a Task Bot finishes its role, it leaves the chat and returns the control to the previous agent.