Comm100 Agent SSO allows your agents to have a single login across Comm100 and other applications. Once logged in, you can move swiftly between Comm100 and other applications without needing to log into separate accounts or remember multiple usernames and passwords.
Comm100 supports Agent SSO via SAML (Security Assertion Markup Language) or JWT (JSON Web Token). This article introduces the steps on how you can enable the SSO with SAML. If you have been authenticated outside of the Comm100 system, you will be seamlessly granted access to Comm100 after implementing the SAML SSO.
As Comm100 account admin, read the following sections to enable the SAML Agent SSO option in your Comm100.
- Required Information for Enabling SAML SSO
- Enable SAML SSO in your Comm100 Account
- User Management after Enabling SAML SSO
- Log into your Comm100 Account with SSO
As the Microsoft Azure Active Directory (Azure AD) supports the SAML 2.0 protocol, if you are using identity provider Azure AD, please refer to this tutorial for a quick start with SAML SSO Integration between Comm100 Live Chat and your Azure AD.
Required Information for Enabling SAML SSO
This is how SAML SSO works. If a user or agent attempts to log into their Comm100 Account, they will be redirected to your configured SAML service for authentication. Once they are authenticated, the user or agent is redirected back to Comm100 and automatically logged in. To set up SAML SSO, meet with your tech team responsible for the SAML authentication system, to ensure that your company has a SAML service for Comm100 users.
Ask your tech team to provide the following information:
- The remote login URL for your SAML that Comm100 will redirect your agents to for remote authentication.
- (Optional)The remote logout URL where Comm100 can redirect users after they sign out of Comm100.
- The SAML certificate from your SAML server. X.509 certificates are supported and should be in PEM or DER format.
To configure the SAML authentication system, your tech team, usually your IT Department, may require additional information from Comm100. Please ask your team to refer to the Technical Implementation Details at the end of this article.
After you gather this information, enter it to Enable SAML SSO in your Comm100 Account.
Enable SAML SSO in your Comm100 Account
- Log in to your Comm100 Control Panel.
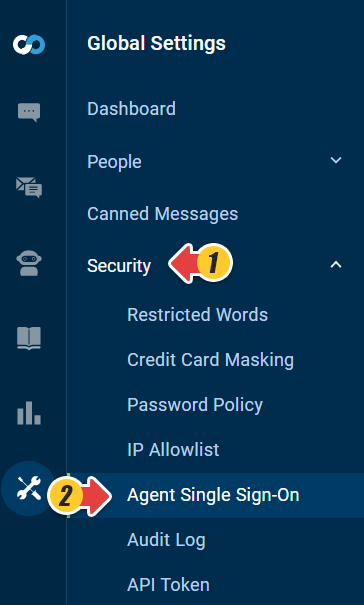
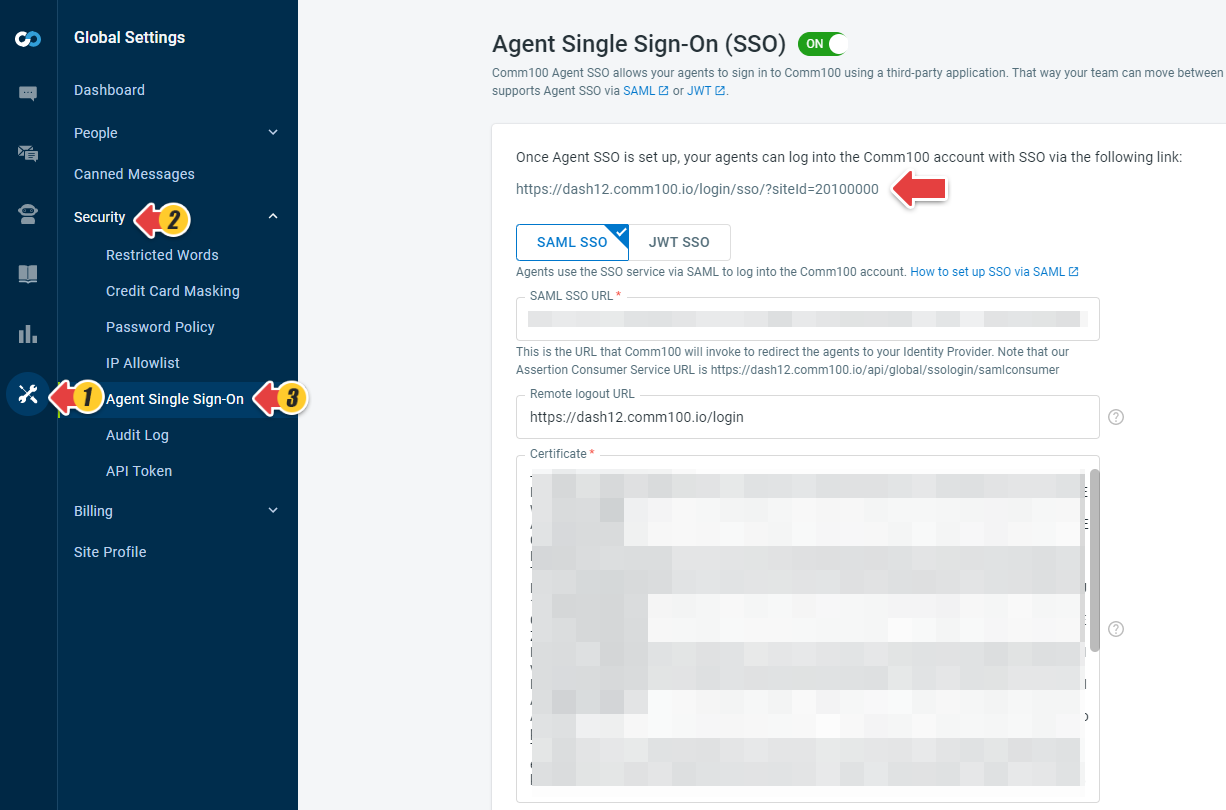
- From the left navigation menu, go to Global Settings > Security > Agent Single Sign-On.
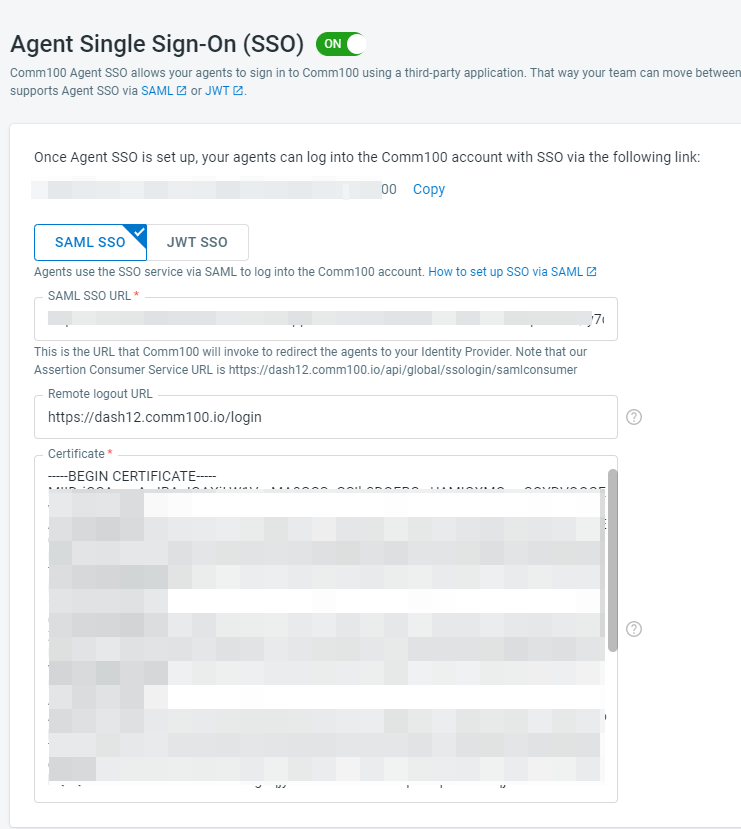
- Turn on the Agent Single Sign-On (SSO)toggle key.
- Switch to SAML SSO, and fill in the required information.
As we mentioned in the first section of this article, collaborate with your technical team and get the Remote Login URL and Remote Logout URL. For the Certificate, you can obtain the certificate from your SAML Identify Provider. Please check with your technical team about getting this information.
You can also find an SSO login URL displayed on the page, share the link with your agents and have them log into their Comm100 account once you set up Agent SSO.
- Switch to SAML SSO, and fill in the required information.
- Click Save.
User Management after Enabling SAML SSO
After you enable the agent SSO, note that:
- Only your account admins can use their Comm100 username and password to log into their Comm100 account after Agent SSO with SAML, or SAML authentication has been enabled. Non-admin agents can only be signed into Comm100 via the enabled SSO platform. When trying to log in using Comm100 credentials, non-admin agents will receive an error message.
- After Agent SSO is enabled, non-admin agents' Comm100 password cannot be reset, whether by themselves or by the account admin.
- Only after your account admin creates an agent account with an email address that matches one from your SSO system, will an agent access their Comm100 account via SAML SSO.

Log into your Comm100 Account with SSO
After you enable agent SSO and connect Comm100 to your SSO platform, your non-admin agents will need to log into Comm100 via your SSO service.
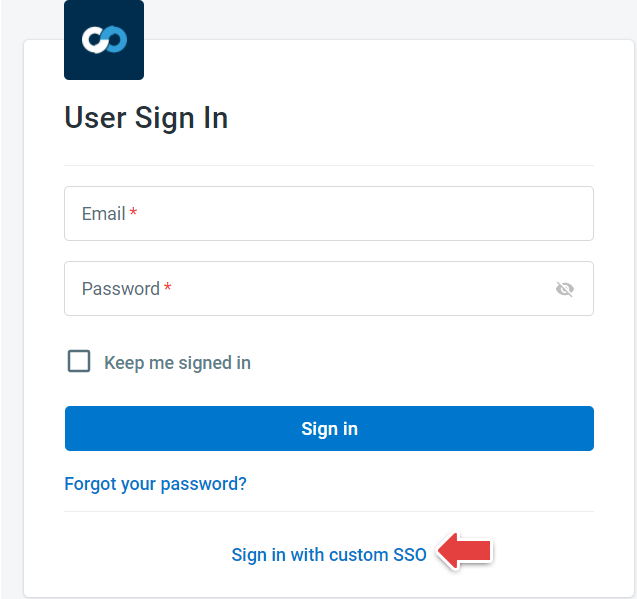
- Go to your account User Sign-In page.
- Click Sign in with custom SSO.
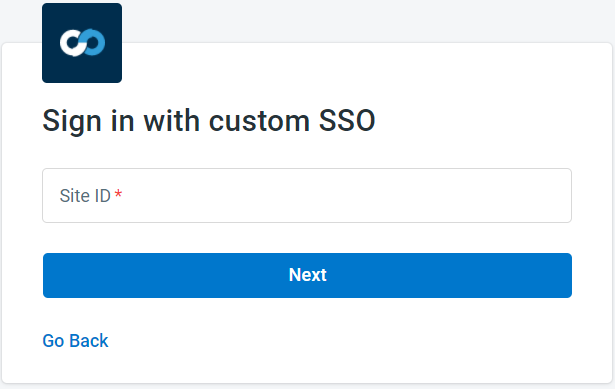
- Provide your Comm100 Site ID and click Next.
Note: If you are unsure about your Comm100 site ID, consult your Comm100 account admin or refer to this article.
As mentioned in the previous section, in your SAML SSO configuration page of the Comm100 control panel, you can find the complete SSO login URL, including the Comm100 Site ID. Example: https://dash12.comm100.io/login/sso/?siteid=20100000 - Comm100 redirects you to the configured login system according to your SAML implementation.
- If you’ve already signed into your own login system, you will automatically be authenticated and logged into your Comm100 account. If you are not signed in, log into your system first, and you will be authenticated and given access Comm100.
Technical Implementation Details
Ask the relevant tech team in your company who is responsible for the SAML implementation to refer to the following technical details:
- Required user attributes
- Configuring the identity provider for Comm100
- Configuring the SAML server for Comm100
Required user attributes
Attribute | Description |
Email of the user signing in. It is used to identify the user record in your Comm100 account uniquely. |
Assigning an identity provider for Comm100
Attribute | Value |
entityID | comm100 |
Configuring the SAML server for Comm100
When configuring the integration with Comm100, you may need the following information:
- Assertion Consumer Service(ACS) URL: You can find the ACS URL when enabling the SAML SSO in your Comm100 account.
- Redirects to SAML Single Sign-on URL: Use HTTP POST